There’s something wonderfully comforting about a bowl of Homemade Vanilla Pudding made from scratch. It’s silky, creamy, rich with real vanilla flavor, and surprisingly easy to make with simple ingredients you probably already have in your kitchen.
Unlike instant pudding, homemade vanilla pudding has a smooth, custard-like texture and a fresh flavor that makes it feel like a special dessert. It comes together quickly on the stovetop and can be served warm or chilled with whipped cream and fresh berries.
Whether you’re making an easy weeknight dessert, preparing something for a family gathering, or simply craving a nostalgic treat, this homemade pudding is worth making from scratch.
Why You’ll Love This Homemade Vanilla Pudding
- Ready in about 15 minutes of active cooking time.
- Made with simple pantry and refrigerator staples.
- Rich, creamy, and incredibly smooth.
- Real vanilla gives it a much better flavor than boxed pudding.
- Delicious warm or chilled.
- Easy to prepare ahead of time.
- Perfect with fresh berries, whipped cream, or cookies.
- A great beginner-friendly dessert.
Ingredients
For Vanilla Pudding
- 2 cups whole milk
- ½ cup granulated sugar
- 3 tablespoons cornstarch
- ¼ teaspoon salt
- 2 large egg yolks
- 2 tablespoons unsalted butter
- 2 teaspoons pure vanilla extract
For Serving
- Whipped cream
- Fresh raspberries or strawberries
- Extra vanilla extract, optional
- Shortbread cookies or vanilla wafers, optional
Why These Ingredients Matter
- Whole milk creates a rich, creamy pudding. You can use 2% milk, but finished pudding will be slightly less rich.
- Cornstarch is the thickening agent. It gives the pudding its smooth, spoonable consistency without requiring a complicated custard technique.
- Egg yolks add richness and help create a silky texture.
- Butter adds a luxurious finish and makes the pudding taste richer.
- Vanilla extract provides main flavor, so use a good-quality pure vanilla extract when possible.
Ingredient Substitutions
- Milk: Whole milk is best, but 2% milk can be used. Avoid skim milk if you want a rich pudding.
- Cornstarch: Don’t substitute flour in equal amounts. Cornstarch creates a smoother, lighter texture.
- Butter: Salted butter can be used; simply reduce or omit added salt.
- Vanilla: Pure vanilla extract works beautifully. Vanilla bean paste can also be used for a stronger vanilla flavor.
- Sugar: Granulated sugar provides the cleanest flavor and texture for this recipe.
Kitchen Tools Needed
- Medium saucepan
- Whisk
- Mixing bowl
- Fine-mesh strainer, optional
- Heatproof serving bowls or glasses
- Plastic wrap
How to Make Homemade Vanilla Pudding
1. Combine Dry Ingredients
In a medium saucepan, whisk together granulated sugar, cornstarch, and salt.
Mixing the cornstarch with sugar first helps distribute it evenly and reduces the chance of lumps forming later.
2. Add the Milk and Egg Yolks
Gradually whisk in the milk until the mixture is smooth.
Add the egg yolks and whisk thoroughly to combine.
Make sure there are no visible clumps of cornstarch before placing the saucepan on the stove.
3. Cook Pudding
Place aucepan over medium heat.
Whisk constantly as the mixture warms. After several minutes, the pudding will begin to thicken.
Continue cooking until it reaches a gentle boil and becomes thick enough to coat the back of a spoon.
This constant whisking is important because it keeps the cornstarch from settling on the bottom and prevents the egg yolks from scrambling.
4. Cook Until Thick
Once pudding reaches a gentle boil, continue cooking for about 1 minute, whisking constantly.
The pudding should look glossy and thick. When you lift the whisk, the mixture should fall back slowly rather than running like milk.
Don’t cook it aggressively over high heat. A moderate temperature gives you better control and helps create a smooth texture.
5. Add Butter and Vanilla
Remove saucepan from the heat.
Immediately whisk in butter and vanilla extract until the butter melts completely and the pudding becomes smooth and glossy.
The vanilla is added at the end so its delicate flavor stays fresh.
6. Strain for Extra Smoothness
For an especially silky pudding, pour the mixture through a fine-mesh strainer into a clean bowl.
This step is optional, but it’s useful if you notice tiny bits of cooked egg or lumps.
7. Chill Pudding
Divide pudding between serving bowls or glasses.
If you don’t want a skin to form on the surface, place plastic wrap directly against the surface of the pudding.
Refrigerate for at least 2 hours, or until completely chilled and set.
8. Serve
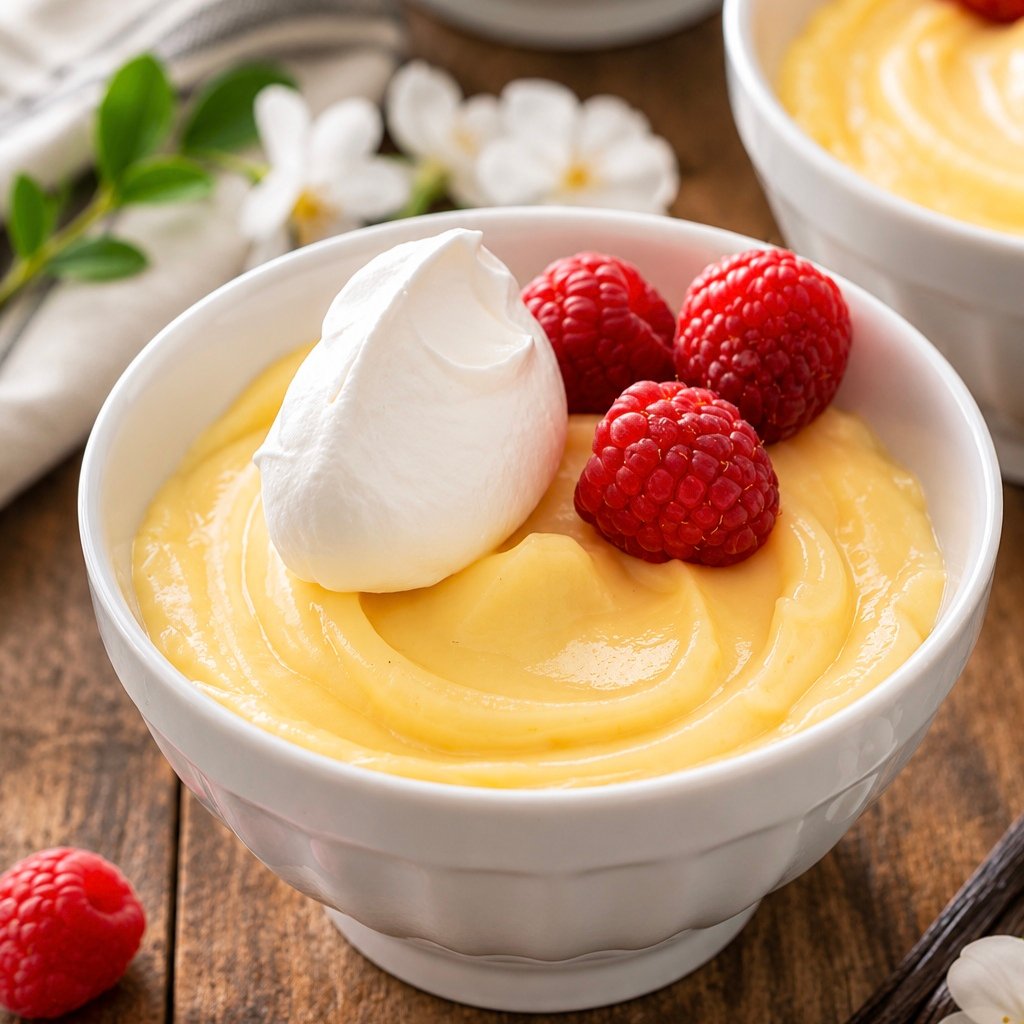
Top each serving with a spoonful of whipped cream and fresh raspberries.
You can also add sliced strawberries, blueberries, crushed vanilla wafers, or a light dusting of cinnamon.
For a warm dessert, serve the pudding shortly after cooking.
Pro Tips for Smooth Vanilla Pudding
Whisk constantly
Cornstarch settles quickly, and constant whisking helps prevent lumps and scorching.
Don’t use high heat
High heat can cause the milk mixture to scorch or the egg yolks to cook too quickly. Medium heat gives you better control.
Watch for the right consistency
The pudding should be noticeably thick before you remove it from the heat. It will become even thicker as it cools.
Add vanilla at the end
Cooking vanilla for too long can dull its flavor. Stir it in after removing the pudding from the heat.
Strain if necessary
A fine-mesh strainer is an easy way to remove small lumps and produce an exceptionally smooth pudding.
Cover the surface
Press plastic wrap directly against the pudding before refrigerating if you don’t want a skin to form.
Variations
Chocolate Vanilla Pudding
Add 2 tablespoons unsweetened cocoa powder along with the cornstarch for a chocolate version.
Vanilla Berry Pudding
Layer the chilled pudding with fresh strawberries, blueberries, and raspberries in small dessert glasses.
Banana Pudding
Layer vanilla pudding with sliced bananas and vanilla wafers for an easy homemade banana pudding.
Coconut Vanilla Pudding
Replace ½ cup of the milk with canned full-fat coconut milk for a subtle coconut flavor.
Cinnamon Vanilla Pudding
Add ¼ teaspoon ground cinnamon for a warm, cozy twist.
Lemon Vanilla Pudding
Add 1 teaspoon finely grated lemon zest for a bright citrus note.
What to Serve With Homemade Vanilla Pudding
Homemade vanilla pudding is delicious on its own, but toppings make it even better.
Try serving it with:
- Fresh raspberries
- Strawberries
- Blueberries
- Whipped cream
- Vanilla wafers
- Shortbread cookies
- Toasted nuts
- Caramel sauce
- Chocolate shavings
- Fresh mint
For a simple presentation, spoon the pudding into small glasses and top with whipped cream and a few fresh berries.
Storage Instructions
Refrigerator
Store homemade vanilla pudding covered in the refrigerator for up to 3–4 days.
Keep it chilled until ready to serve.
Freezer
Freezing isn’t recommended. The pudding can become watery or lose its smooth texture after thawing.
Reheating
If you prefer warm pudding, gently reheat it in a saucepan over low heat, stirring frequently.
You can add a small splash of milk if it has become too thick.
Make-Ahead Tips
This is an excellent make-ahead dessert.
Prepare the pudding up to 2 days ahead, divide it into individual serving dishes, cover, and refrigerate.
Add whipped cream and fresh berries immediately before serving for the best presentation.
Frequently Asked Questions
Can I make vanilla pudding without eggs?
Yes. The cornstarch can provide the thickening on its own. However, the egg yolks add richness and create a more custard-like texture.
Why is my pudding lumpy?
Lumps usually happen when the cornstarch isn’t fully incorporated or the mixture isn’t whisked consistently. Whisk the dry ingredients together first and continue whisking while the pudding cooks.
Why didn’t my pudding thicken?
The pudding may need more cooking time. Cornstarch needs to reach a gentle boil to fully activate. Continue whisking and cooking for about a minute after it begins boiling.
Can I use vanilla bean paste?
Absolutely. Vanilla bean paste is an excellent substitute for vanilla extract and gives the pudding beautiful vanilla specks.
Can I use 2% milk?
Yes. The pudding will still work, although whole milk produces a richer and creamier result.
How do I prevent a skin from forming?
Press plastic wrap directly onto the surface of the pudding while it cools.
Can I serve this pudding warm?
Yes. Homemade vanilla pudding is delicious both warm and chilled. If serving warm, spoon it into bowls shortly after cooking.
How long does homemade pudding last?
Keep it covered in the refrigerator and enjoy it within 3–4 days.
Homemade Vanilla Pudding
Ingredients
Method
- In a medium saucepan, whisk together the granulated sugar, cornstarch, and salt.
- Gradually whisk in the milk until completely smooth.
- Add the egg yolks and whisk until well combined.
- Place the saucepan over medium heat and cook, whisking constantly.
- Continue cooking until the mixture thickens and reaches a gentle boil.
- Once bubbling, continue cooking for about 1 minute, whisking constantly.
- Remove the saucepan from the heat.
- Whisk in the butter and vanilla extract until the butter melts and the pudding becomes smooth and glossy.
- For an extra-smooth texture, pour the pudding through a fine-mesh strainer into a clean bowl.
- Divide the pudding between serving bowls or glasses.
- Press plastic wrap directly onto the surface if you want to prevent a skin from forming.
- Refrigerate for at least 2 hours, or until chilled and set.
- Top with whipped cream and fresh berries before serving.