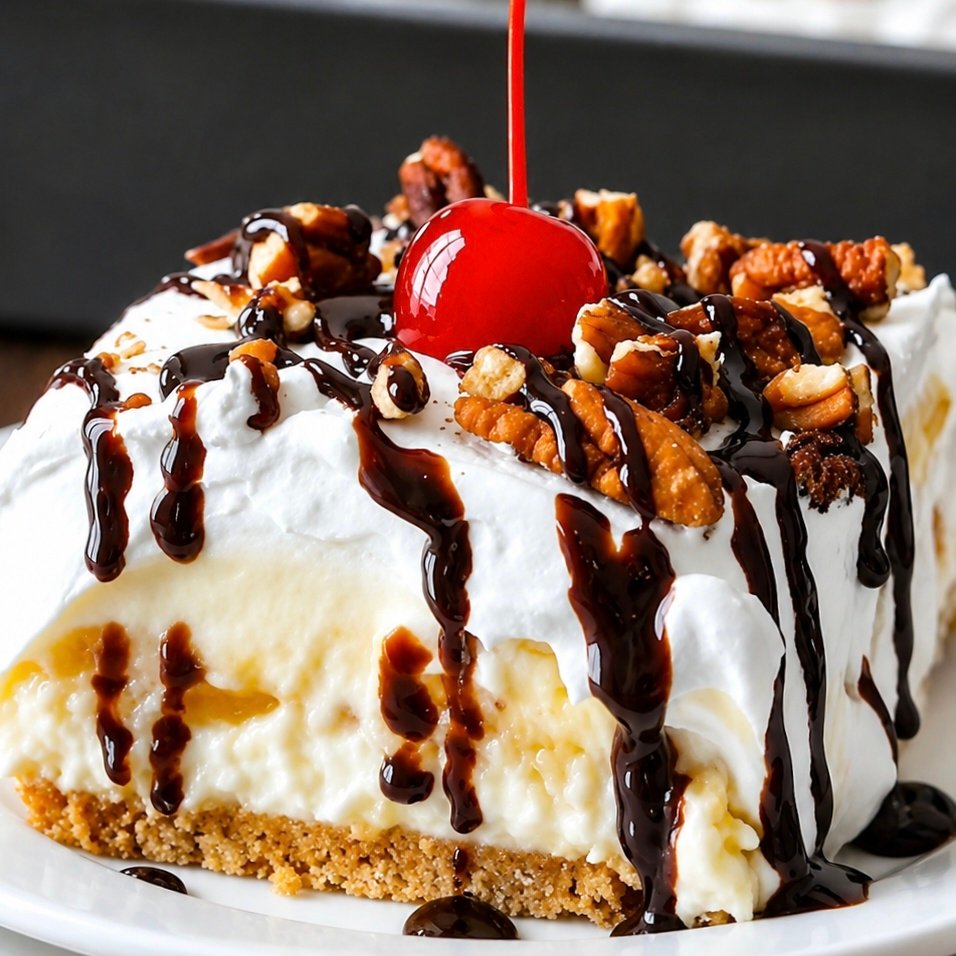
Craving a dessert that feels like a classic banana split but doesn’t require turning on the oven? This No-Bake Banana Split Cheesecake brings together a buttery graham cracker crust, creamy cheesecake filling, bananas, pineapple, whipped topping, and all the fun toppings you love.
It’s cool, creamy, fruity, and incredibly easy to assemble. Since whole dessert chills in refrigerator, it’s especially handy for summer parties, potlucks, birthdays, cookouts, and family gatherings. Inspiration is familiar banana-split combination, but recipe below is written from scratch with its own ingredient balance and method.
Why You’ll Love This No-Bake Cheesecake
- No oven required
- Cool and refreshing for warm-weather desserts
- Creamy cheesecake texture
- Fresh banana and pineapple add fruity flavor
- Buttery graham cracker crust
- Easy to assemble in a 9×13-inch pan
- Perfect for feeding a crowd
- Can be prepared ahead
- Fun to customize with your favorite banana split toppings
Ingredients
For the Graham Cracker Crust
- 2 cups graham cracker crumbs
- ½ cup unsalted butter, melted
- ¼ cup granulated sugar
For the Cheesecake Layer
- 16 ounces cream cheese, softened
- ¾ cup powdered sugar
- 1 teaspoon vanilla extract
- 1 cup whipped topping
For the Fruit Layer
- 1 can (20 ounces) crushed pineapple, very well drained
- 4 medium bananas, sliced
For the Pudding Layer
- 1 package (3.4 ounces) instant cheesecake pudding mix
- 1½ cups cold milk
- ½ cup whipped topping
For the Topping
- 1½ cups whipped topping
- ½ cup chopped pecans or peanuts
- Chocolate syrup
- Maraschino cherries
- Fresh strawberries, optional
- Additional banana slices, optional
Choosing the Right Bananas
Use bananas that are ripe enough to be naturally sweet but still firm. Very soft or heavily spotted bananas can break down quickly once layered into the dessert.
If you’re preparing the cheesecake ahead, save the decorative banana slices for just before serving. This helps keep the topping looking fresh.
How to Make No-Bake Banana Split Cheesecake
1. Prepare the Crust
Combine the graham cracker crumbs, melted butter, and granulated sugar in a bowl.
Stir until the crumbs are evenly moistened. Press the mixture firmly into the bottom of a 9×13-inch baking dish.
Place the crust in the refrigerator while you prepare the filling.
2. Make the Cheesecake Layer
Beat the softened cream cheese and powdered sugar until smooth and creamy.
Add the vanilla extract and mix until incorporated. Gently fold in the whipped topping until the mixture is light and fluffy.
Spread the cheesecake mixture evenly over the chilled crust.
3. Add the Pineapple
Drain the crushed pineapple extremely well.
Excess pineapple juice can make the dessert watery, so press the pineapple gently against a fine-mesh strainer or use paper towels to remove additional moisture.
Spread the pineapple evenly over the cheesecake layer.
4. Add the Bananas
Slice the bananas into thin, even rounds.
Arrange them over the pineapple layer, creating an even layer so every serving gets plenty of banana.
5. Prepare the Pudding
Whisk the cheesecake pudding mix with cold milk until thickened.
Fold in the whipped topping until smooth and creamy.
Spread the pudding mixture evenly over the banana layer.
6. Add the Final Creamy Layer
Spread the remaining whipped topping over the pudding layer.
Smooth the top with a spatula.
7. Add the Banana Split Toppings
Drizzle chocolate syrup over the top.
Sprinkle with chopped pecans or peanuts and finish with maraschino cherries.
You can also add sliced strawberries or wait until serving to add fresh banana slices.
8. Chill
Cover the pan and refrigerate for at least 2 hours.
For the best texture, allow the cheesecake to chill several hours before slicing. The layers will become firmer and easier to serve as they cool.
Tips for the Best No-Bake Banana Split Cheesecake
Drain the pineapple thoroughly
This is one of the most important steps. Too much pineapple juice can soften the crust and make the layers difficult to cut.
Use softened cream cheese
Room-temperature cream cheese blends much more smoothly and prevents lumps in the cheesecake layer.
Keep the bananas firm
Choose ripe but firm bananas rather than very soft ones.
Chill before slicing
Give the dessert plenty of time in the refrigerator. A properly chilled cheesecake will hold its layers much better.
Add decorative bananas later
If you’re making this dessert ahead, add the prettiest banana slices just before serving to minimize browning.
Don’t overload the top
A few simple toppings make the dessert look beautiful without making individual pieces difficult to serve.
Easy Variations
Chocolate Banana Split Cheesecake
Add a thin layer of chocolate cookie crumbs to the crust or drizzle extra chocolate syrup over each serving.
Strawberry Banana Split Cheesecake
Add a layer of sliced strawberries along with the bananas for extra fresh fruit flavor.
Peanut Butter Banana Split Cheesecake
Drizzle warmed peanut butter over the top before adding the nuts.
Nut-Free Version
Simply leave out the pecans or peanuts. The cheesecake will still have plenty of flavor and texture from the fruit and crust.
Chocolate Crust
Replace part of the graham cracker crumbs with chocolate cookie crumbs for a chocolate-banana combination.
Caramel Banana Split Cheesecake
Add a light drizzle of caramel sauce alongside the chocolate syrup.
What to Serve With It
This cheesecake is a complete dessert on its own, but it’s especially fun served with:
- Extra whipped cream
- Chocolate syrup
- Caramel sauce
- Fresh strawberries
- Chopped peanuts
- Chopped pecans
- Maraschino cherries
- Vanilla ice cream
For a party, set out several toppings and let everyone customize their own slice.
Make-Ahead Instructions
This dessert is ideal for making ahead.
Prepare the cheesecake several hours before serving and keep it covered in the refrigerator. You can even assemble it the day before.
For the freshest presentation, wait until shortly before serving to add decorative banana slices and any toppings that you want to look especially fresh.
Storage
Store leftover cheesecake covered in the refrigerator for up to 3 days.
The bananas will gradually soften and darken, so this dessert is best enjoyed within the first couple of days.
Freezing isn’t recommended because the bananas, pudding, and whipped topping can change texture after thawing.
Frequently Asked Questions
Can I make this cheesecake the day before?
Yes. It’s actually a great make-ahead dessert. Prepare it the day before and keep it covered and refrigerated.
Why is my cheesecake too soft?
The most common causes are insufficient chilling or excess liquid from the pineapple. Make sure the pineapple is very well drained and allow plenty of time for the dessert to set.
How do I keep the bananas from turning brown?
Use firm bananas and add decorative banana slices shortly before serving. Keeping the dessert refrigerated also helps slow browning.
Can I use homemade whipped cream?
Yes. Homemade whipped cream can be used, although a stabilized whipped cream is preferable if the cheesecake will sit for several hours.
Can I use a prepared graham cracker crust?
For a smaller version, you can use a prepared crust. For a crowd-sized dessert, a 9×13-inch pan gives you the classic layered presentation.
Can I leave out the pudding?
The pudding layer adds structure and creaminess, so leaving it out will change the texture. If you prefer a simpler version, you can use an additional cheesecake filling layer instead.
No-Bake Banana Split Cheesecake
Ingredients
Method
- Combine graham cracker crumbs, melted butter, and granulated sugar until evenly moistened.
- Press the mixture firmly into the bottom of a 9×13-inch baking dish. Refrigerate while preparing the filling.
- Beat softened cream cheese and powdered sugar until smooth and creamy.
- Mix in vanilla extract, then gently fold in 1 cup whipped topping.
- Spread the cream cheese mixture evenly over the chilled crust.
- Drain the crushed pineapple very well. Spread it evenly over the cheesecake layer.
- Slice the bananas and arrange them in an even layer over the pineapple.
- Whisk the cheesecake pudding mix with cold milk until thickened.
- Fold ½ cup whipped topping into the pudding mixture until smooth.
- Spread the pudding mixture evenly over the banana layer.
- Spread the remaining whipped topping over the pudding layer.
- Drizzle chocolate syrup over the top and sprinkle with chopped pecans or peanuts.
- Add maraschino cherries and optional strawberry or banana slices for garnish.
- Cover and refrigerate for at least 2 hours, preferably longer, until the layers are firm enough to slice.
- Cut into squares and serve chilled.
Notes
Nutrition Information
Estimated per serving:
- Calories: 390 kcal
- Carbohydrates: 48g
- Protein: 5g
- Fat: 20g
- Saturated Fat: 11g
- Fiber: 2g
- Sugar: 32g
- Sodium: 260mg
Nutrition information is an estimate and will vary depending on the ingredients and brands used.